Pos can be created by users who have been granted the create PO user role by the system administrator. If the value of the PO exceeds the users approval limit, it will be escalated to another user with sufficient approval limit in the same cost centre to which the PO is assigned. When a PO is fully authorised the user can decide to what supplier contact to send it or alternatively not to send it at all.
Adding Header Details
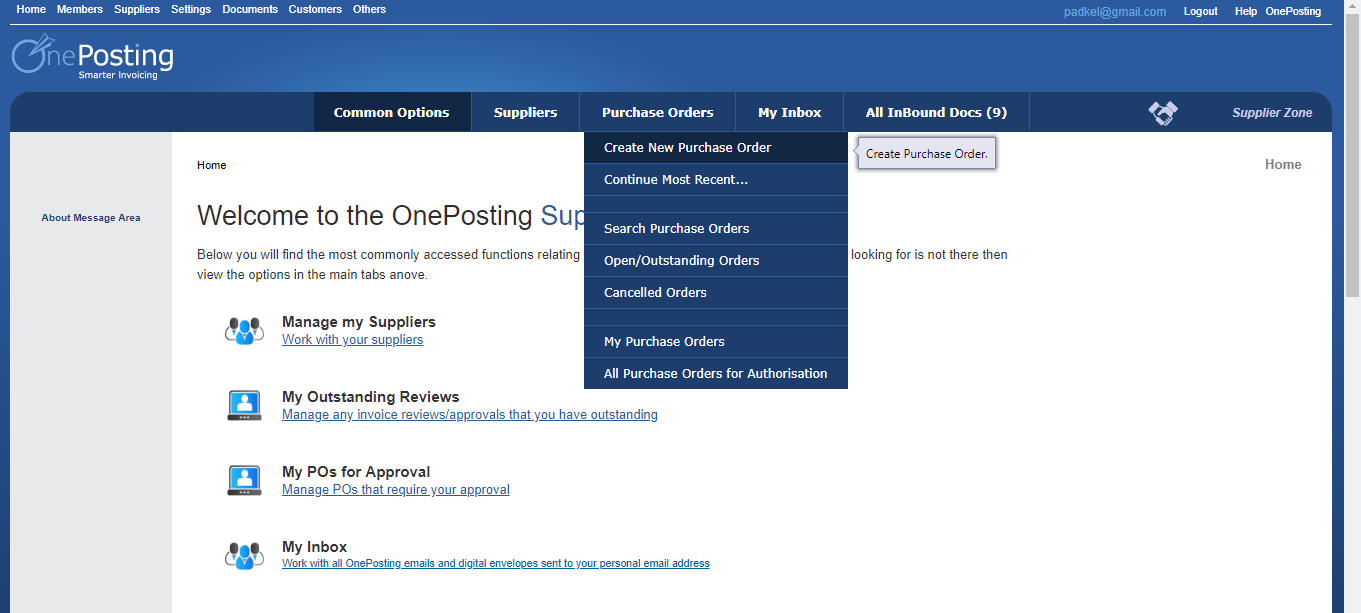
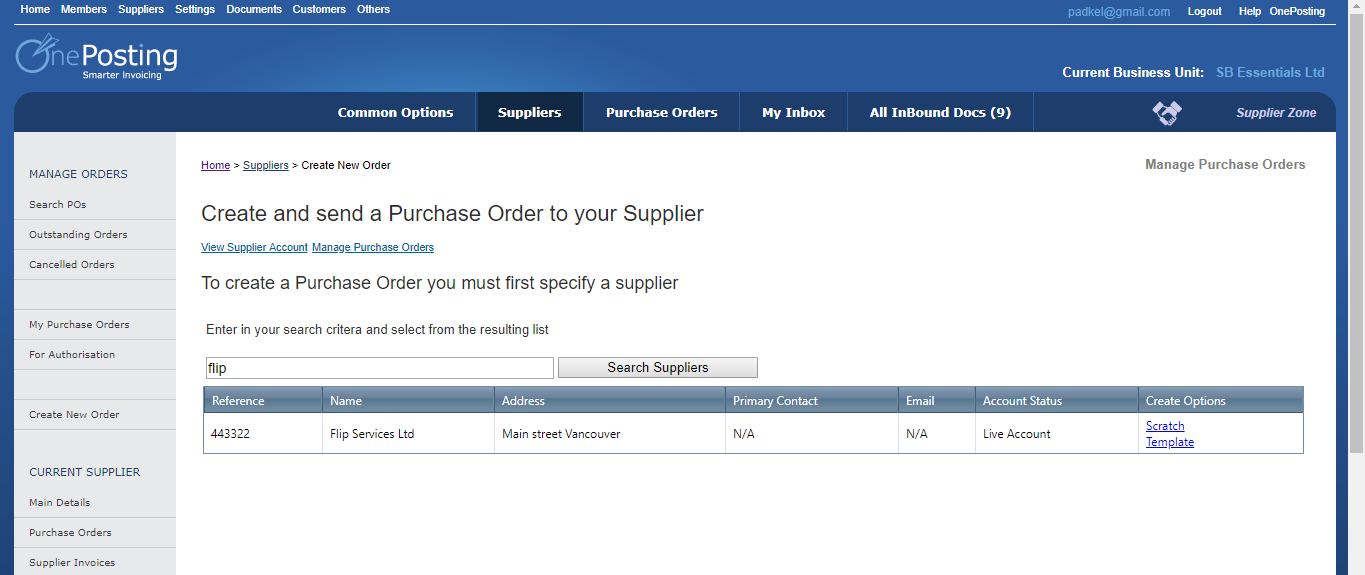
To create a PO, click 'Suppliers' on the top left, then from the 'Purchase Orders' menu on the blue menu bar select 'Create New Order'. Search for the supplier for whom you wish to raise a PO by entering all or part of the supplier ref or name and pressing 'Search Suppliers'. Select the supplier by clicking Scratch or Template in the 'Create Options' column.
- Scratch allows you to enter a new PO from scratch.
- Template loads recently ordered product lines and allows you to enter the QTY & Price as needed to quickly add repeat orders.
At this point you enter the Purchase Order header information.
There are only two mandatory fields:
Cost Centre A division within the business that manages purchases-related costs arising from that division (e.g. Finance, HR, Marketing)
Date Due Indicates the date on which delivery of the goods is due
Other optional fields
Summary Description Short description of the order
Date Expire Date on which the PO expires. Invoices, containing this PO number, submitted after this date will be quarantined by the system.
RMA Number Return Merchandise Authorisation
Read Only fields for display purposes
PO Number / Ref PO Number assigned to the purchase order. When the ordered goods are invoiced by the supplier, this number should be contained on the invoice to facilitate automated Invoice - PO matching.
Unused Fields
Supplier Order Type Only standard types currently supported
Site/Location Locations within each cost centre to which goods/services can be delivered
Shipping Buyers can specify the courier/delivery method to use to deliver the ordered goods
Goods Review Days
Request Acknowledgement
Request Confirmation
Request Shipping Notice
Adding Product/Service lines
By Template: If 'Template' was the Create Option selected earlier historic lines will be loaded on screen.
Simply edit the QTY and / or price for lines you wish to re-order. You can also set the Purchases account and or Tax rate on these lines. If there is a product to be ordered that is not in the list use the Add Purchase Lines option detailed below.
Add Purchase Lines The add new PO line screen is opened. Select the Purchases account and enter the Product details, Quantity, Price and Tax rate. Then click Add item to order.
Add From Sales Catalogue Catalogues of supplier products can be created and stored on the system. A catalogue is added for a single supplier but more than one catalogue can be created for individual suppliers to cater for summer / winter product lists or regular orders made by different cost centres. Selecting this option opens the Add from catalogue window showing the full supplier catalogue. Search for products and edit the Quantity field to add them to the order. You can also edit the Price. Click Add to Order when done to proceed to the next product.
As lines are added to the order a summary of the product lines is shown at the top of the screen.
Submitting the PO
When all lines have been added click the Preview to Send button.
A preview of the PO is displayed on screen. If you need to change anything click the return to order link above the preview.
Select a supplier contact to send the PO to or add a new one. Alternatively click the Do Not Send option to avoid sending the PO via email to the supplier.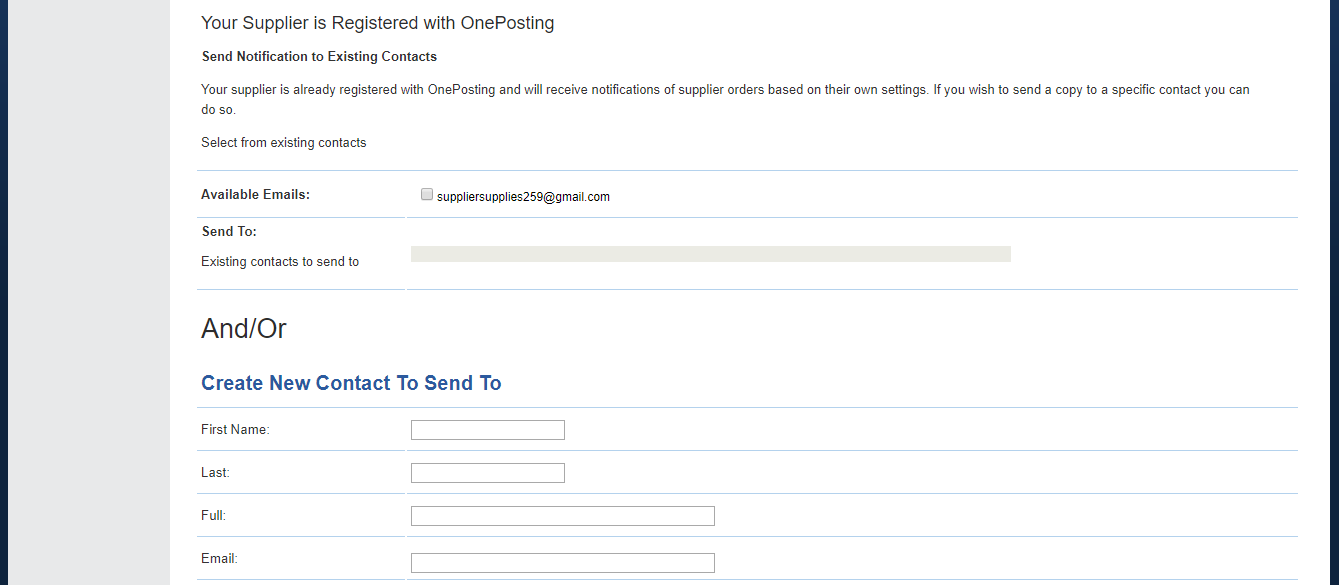
When ready click Submit to OnePosting. If the PO requires escalating due to the PO value being higher than the PO creators approval limit a list of eligible PO authorisers is displayed above the submit button. Select the person to escalate the PO to and click Submit to OnePosting. 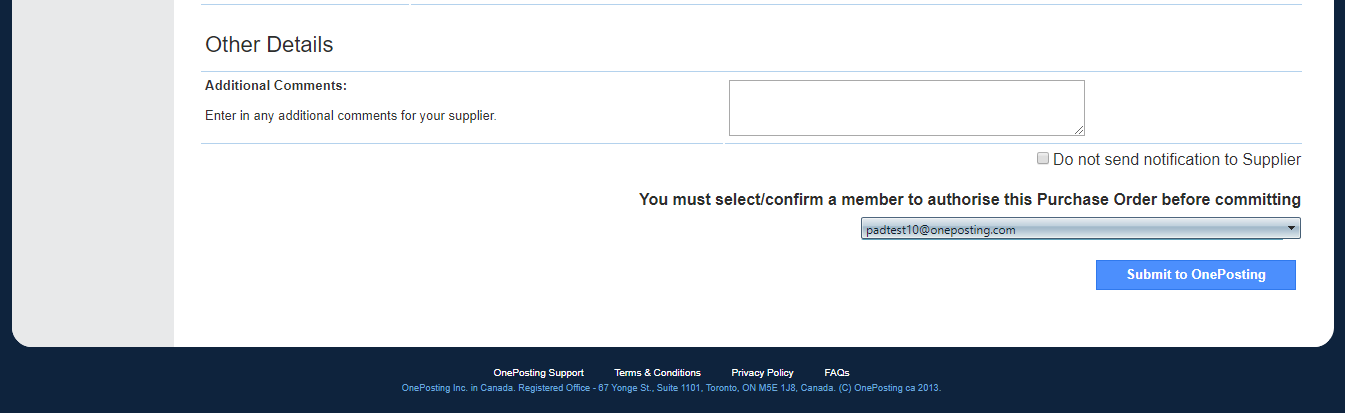
The following screen will show the PO header details including the PO number.
0 Comments